Attendance Views
Administration > Attendance Setup > Setup > Attendance View Setup
You must define an attendance view to calculate excused and unexcused daily absences to be reported to EMIS. All buildings should use the same code for the attendance view.
The view should convert attendance to a value of 1 for all students. When the Student/Course Download option calculates the attendance to report for a student, the student's attendance day total information will be multiplied by the student's percent of time. For example, if a student with a percent of time of 20% attended all 5 days of the October Count Week, the student's October Count Week Attendance Days Element will be calculated as (5 x .20)= 1.
Day Totals Conversion
For EMIS reporting, the day totals will be converted from days to hours using the Instructional Time in the Calendars section. The software will use the current view, unexcused, and excused absents that are selected on the EMIS Student/Course Download page. It will also take into account the following:
-
Views that allow for students to have half day absences
-
Different instructional time for a calendar day (i.e. calamity day) when a student is absent a half or whole day, basing the student's absent time on the instructional time for that day
eSchoolPlus will use the following order in determining where Instructional Time is used in the Hours-to-Minutes conversion:
-
Days-to-Hours Crosswalk. If the calendar day is a calamity day, the software will pull from this field first if the Student Box is checked and time (in minutes) is entered.
-
If there is no time entered on the crosswalk, the software will next look to Instructional Time for the particular day on the Calendar setup and use that time to convert the hours into minutes.
-
If there is no Instructional Time for the particular day, the software will use the Default Instructional Time on the Calendar page.
After these checks have been done by the software, attendances and absences will be multiplied by the Student's Percent of Time for the corresponding dates.
Attendance Intervals
Administration > Attendance Setup > Setup > Attendance Intervals
Use this page to add, change, delete, and view attendance intervals for your building.
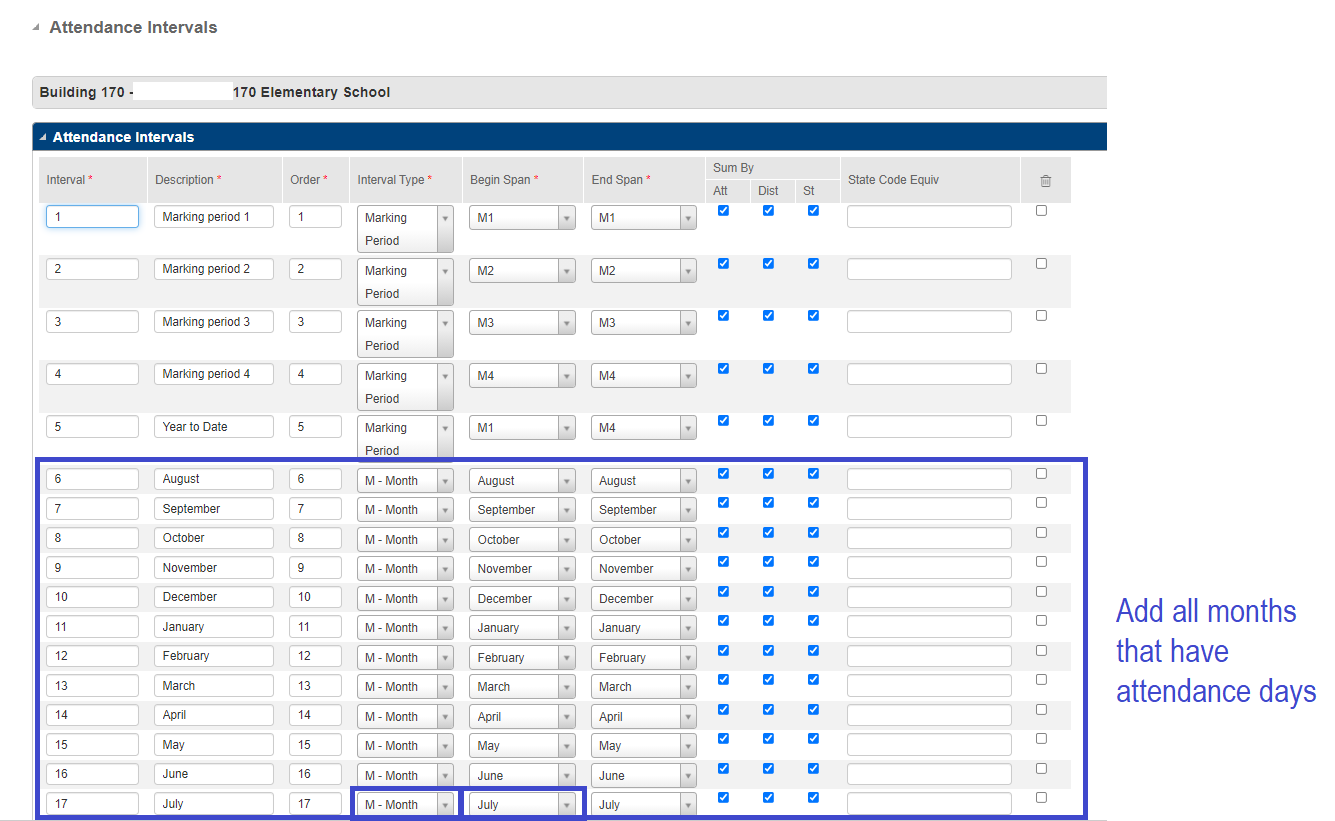
Attendance intervals define the periods of time for which attendance information needs to be totaled and how they should be totaled, for example, by code, district group, or state group. For example, attendance totals may be calculated for a range of dates, for a calendar month, for a set of weeks, or for a specific duration type such as a marking period.
The attendance interval totals are the sum of the day totals for the appropriate interval. The day totals are defined in the attendance views.
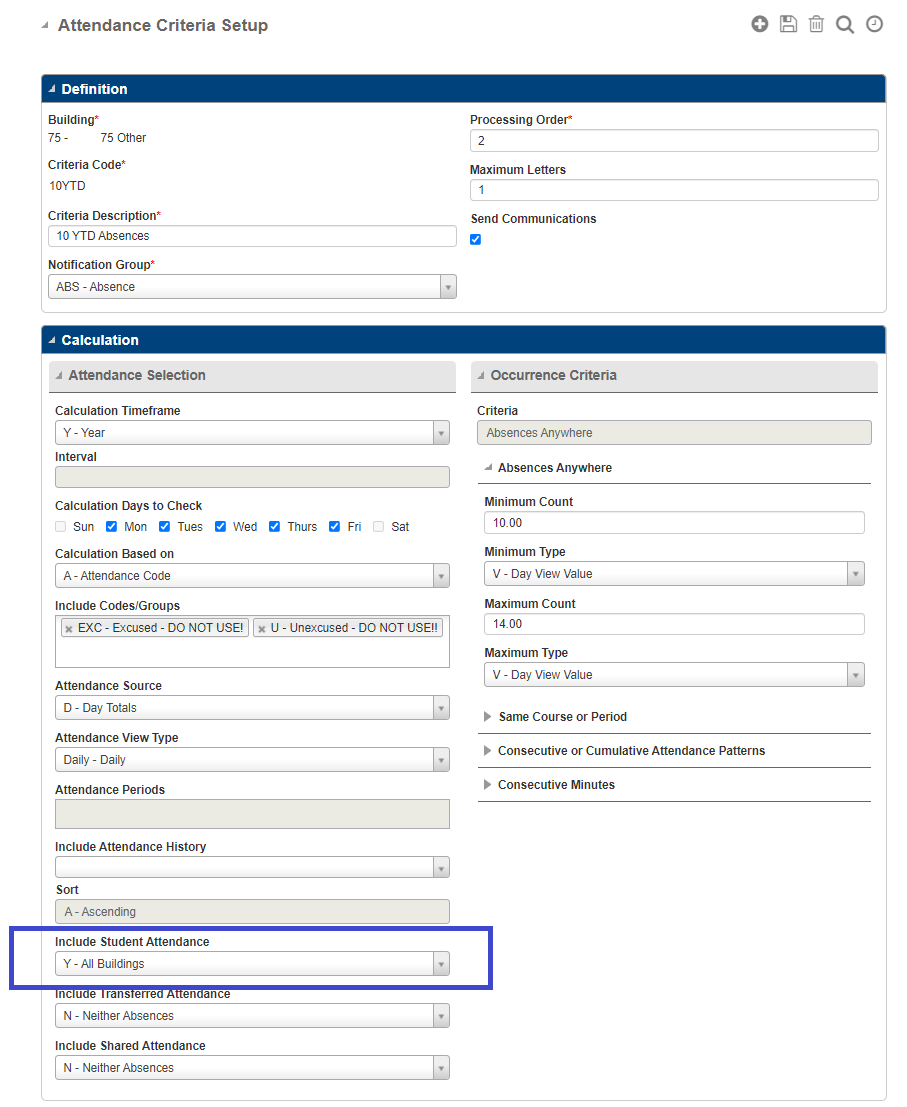
When an Attendance Criteria has Include Student Attendance set to Y - All Buildings, you must have Intervals setup for All building month that have Attendance Days. Using the Y-All Buildings setup will include attendance across all buildings for the students in the defined building.
Attendance Criteria Setup Verification
Select Administration > Interventions Setup > At Risk > Attendance Criteria Setup (choose Criteria).
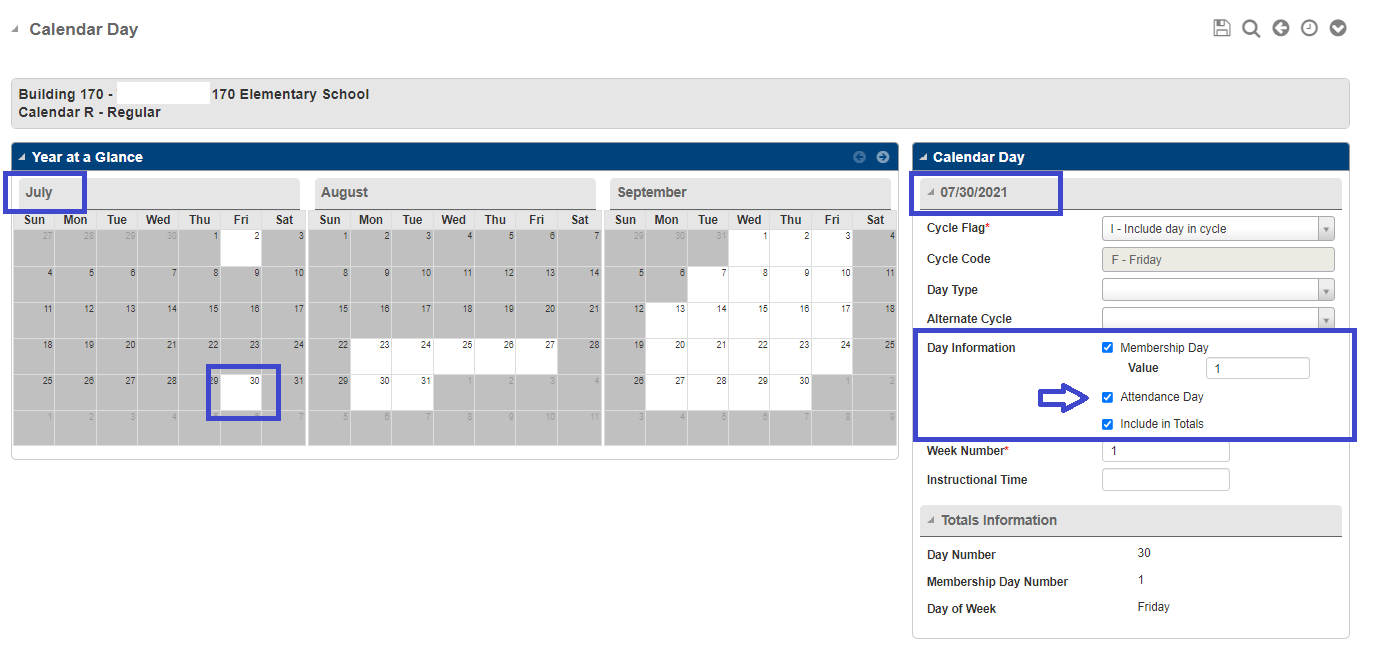
Building Calendar Setup Verification
Select Administration > Registration Setup > Calendars > Calendar.
-
Click the Month View icon to view calendars by month for the building.
-
Verify dates in the month denoted by a white background for an Attendance Day setting.
Any month with at least one Attendance Day must be defined in Attendance Intervals.
For example:
Select the white background date as the Calendar Day.
Verify that the Day Information is checked for Attendance Day, Include in Totals and Membership Day (with Value as 1).
Attendance Intervals addition to existing records
Select Administration > Attendance > Setup > Attendance Intervals.
-
If records display for a building other than the one you want, run a search, then select another building.
-
Complete fields in the blank row at the bottom.
-
Repeat Step 2 for each additional interval.
-
Click Save.